In the Beginning.....
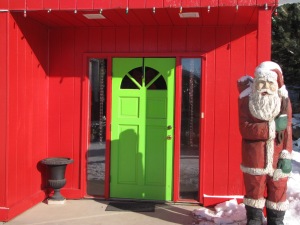
Not very interesting, is it? This is the front of my shop. Like I said before, the beauty is on the other side of the door. But notice the pot in the corner. That is where we are starting.
Put a smaller container inside the urn. It should be watertight Depending upon what will be added to the urn, use a container filled with water or use floral foam that has been thoroughly saturated with water.

The first steps...
Want to add something that really makes the pot, or in this case, more accurately, the urn, pop? Place an undecorated wreath around the opening. In this case, the wreath I used is made of white pine boughs. I sprayed it lightly with white paint and put in on top of the urn. Then I added lights. Notice something different about them? I used icicle lights. I draped the string around the opening–on top of the wreath– and let the “icicles” drop off the side.

The tree top...
Then I added a tree top. This is an actual top of a scotch pine. It works beautifully in a pot. No fussing trying to arrange a bunch of boughs or spruce tips. Just plop a tree top into the pot. Before you add the tree top or the branches, however, re-cut the ends. They will drink water more easily if you do this and your pot will look fresher longer.

Then I added some plug-in candy canes. Then I added some plug-in lighted candy canes. (I decided to work with a candy cane theme. ) I played around with the candy canes, not really knowing which way I wanted them to face. Many times, I don't know exactly what I want to do with a decoration. I just know that once I begin, I will eventually finish and be happy with the results. It's a method I would encourage you to try. More often than not, it works. Try not to be too critical. Leave yourself open to a new perspective and don't hurry. Do things in stages if you must. Play with it until you are pleased with the results. Wrapping lights...
Remember, I laid the icicle lights on top of the wreath, letting the icicles drop around the sides? Now I wrap the remaining lights around each of the branches in the tree top. See the lights going out to the branch tip? I would not do this if I were just using boughs–too much effort and because most boughs aren’t strong enough to support the and disguise the light strands, the results are not particularly satisfying. If I were using just boughs, I would cluster the lights and lay them among the branches. Now the snow.

Now the snow.
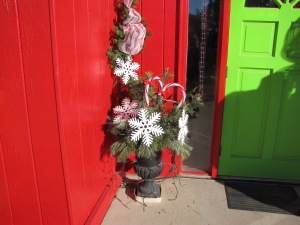
I turned the candy canes toward each other to form a heart shape and added some very large snowflakes. Marilyn, a very dear friend and sometime shop helper, commented that the snowflakes were too large, but I reminded her that this is an outdoor decoration. It is meant to be seen from a distance. I want customers to be aware of this pot from the far side of the parking lot. I want the snowflakes to really show–so I chose large ones. If you are designing a pot for the front of your house, consider using large components. If someone is driving or walking by your house, you want them to notice your decoration–from the street.

Then the bow
I secured the candy canes to the tree top in two places with a narrow red ribbon and added a very large bow to them. I chose this particular ribbon for its fuzziness. The texture is wonderful. So we have the different textures in the greens, the huge snowflakes and candy canes and the beautiful bow. And of course the lights, those lovely icicle lights. Those are going to give this urn an unusual and beautiful effect when night falls.

- Next, I added smaller snowflakes to the ends of the “icicles.”
I twisted the ends of the icicle lights onto smaller snowflakes. This adds interest and helps weight the light strands so that they don’t blow around as much in the wind. I attached the strands to the flakes with short pieces of red cord tied into small bows.

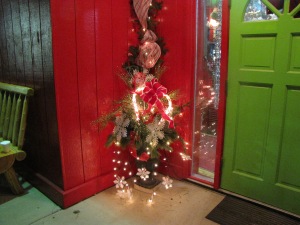
As the day ends, you can see how much interest the icicle lights add.
The beauty of the icicle lights really shine as the light fades. I also added 3 sparkling sprays of lime green and 5 loops of a shiny red mesh ribbon for more daytime interest. What do you think?


